HƯỚNG DẪN SETUP CARD SNMP
18/08/2022HƯỚNG DẪN SETUP CARD SNMP
Tải phần mềm: DOWLOAD SNMP TOOL
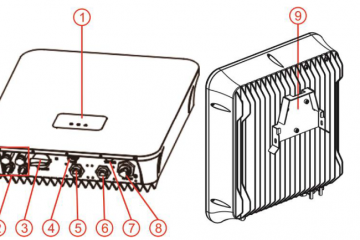
Yêu cầu cài đặt phần mềm: Tìm địa chỉ IP khi xuất xưởng là bao nhiêu?
Ví dụ: Sau khi tìm kiếm địa chỉ mặc định trên card SNMP

- Vào PC cài đặt cấu hình địa chỉ mạng theo lớp mạng mà card SNMP đã tìm
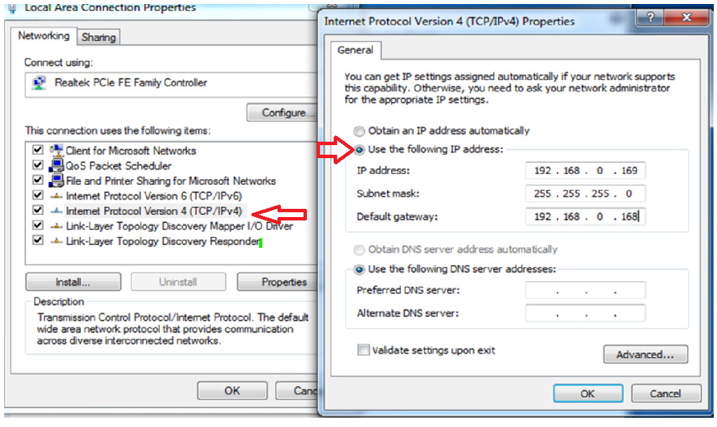
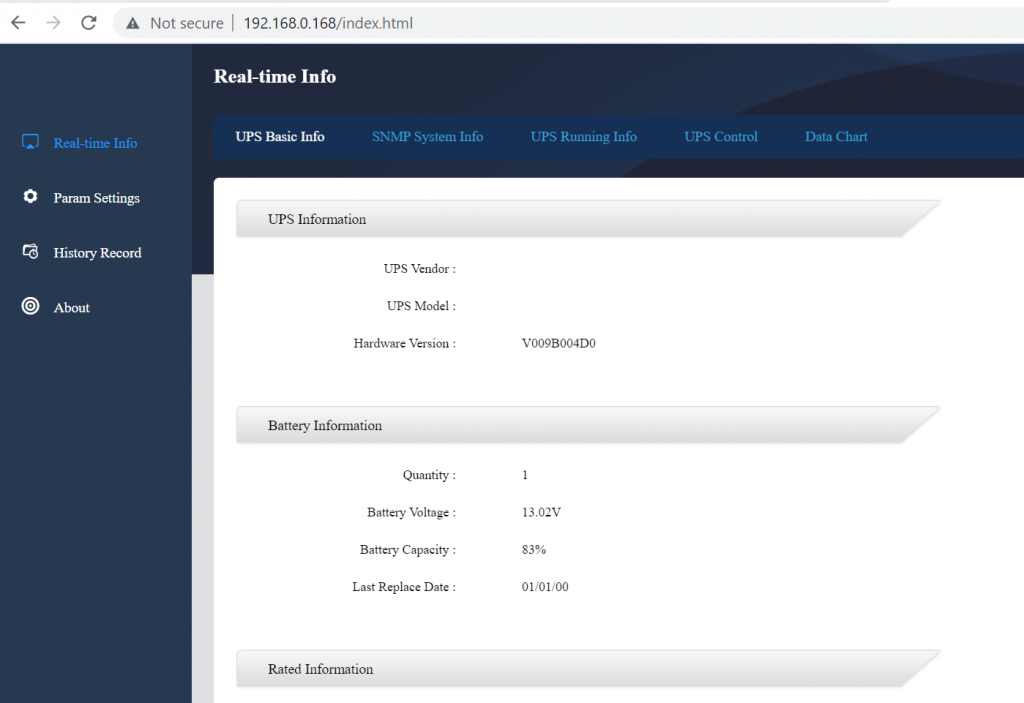
Vào trình duyệt web đăng nhập địa chỉ: 192.168.0.168
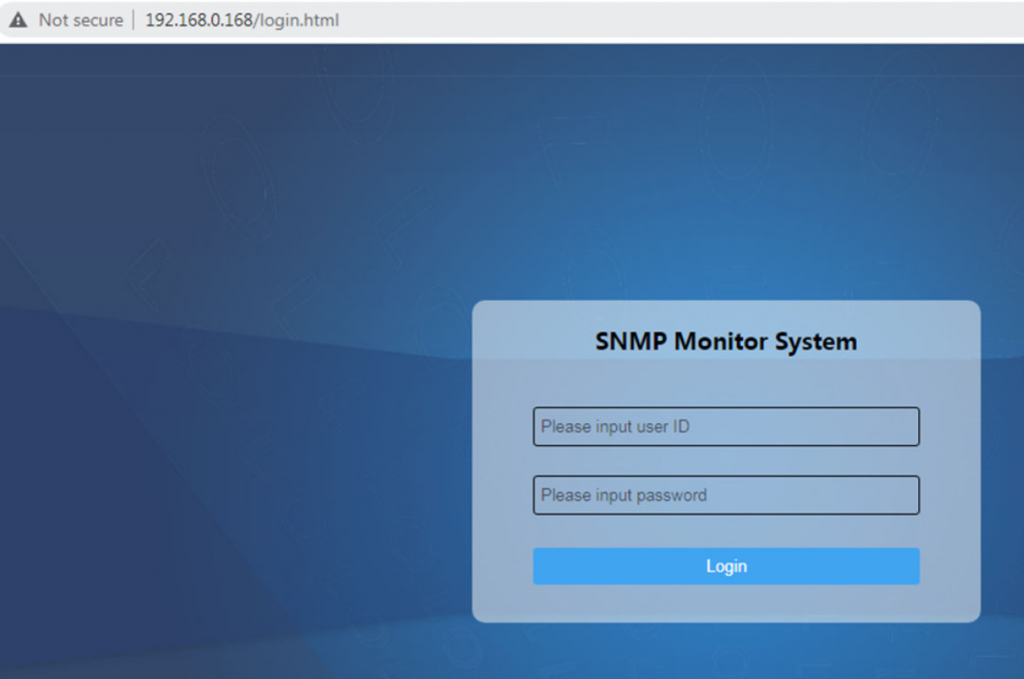
User ID và Password: admin
- Giao diện Web:
Web Monitoring Management
1.1. Real-time Information
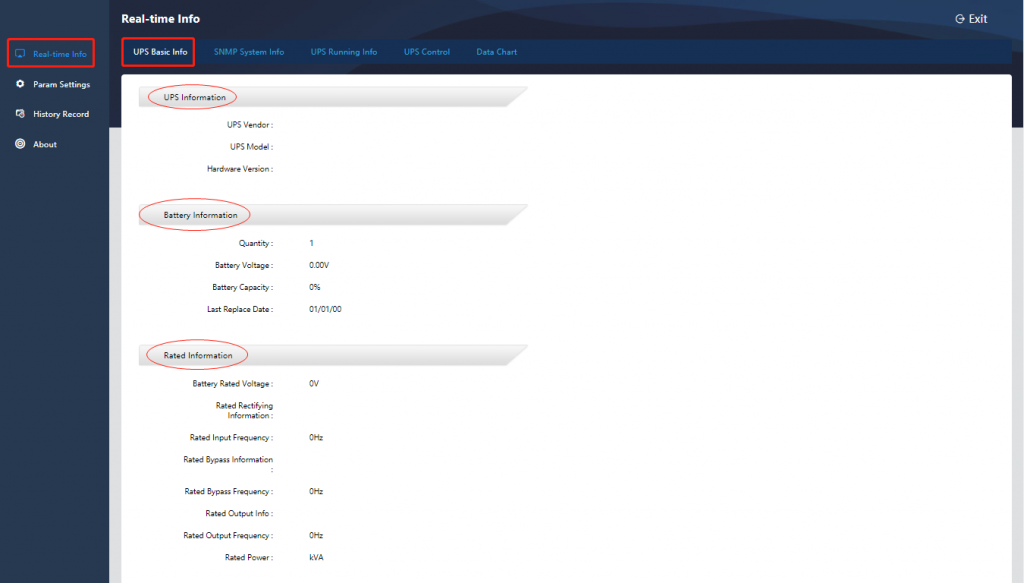
- UPS Basic Information
This item allows viewing basic UPS information, including UPS information, battery information and rated information, as shown in the following figure:
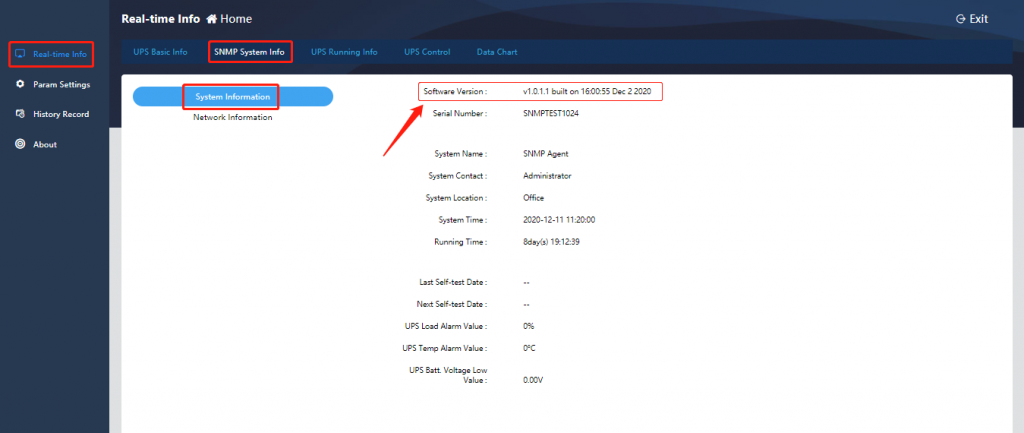
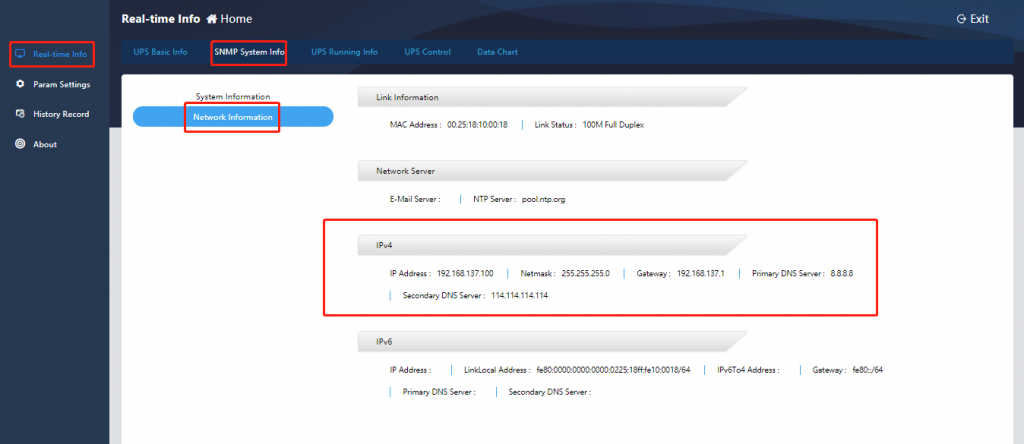
- SNMP System Information
This item allows viewing system information (software version), network information (IP information), as shown in the figure below:
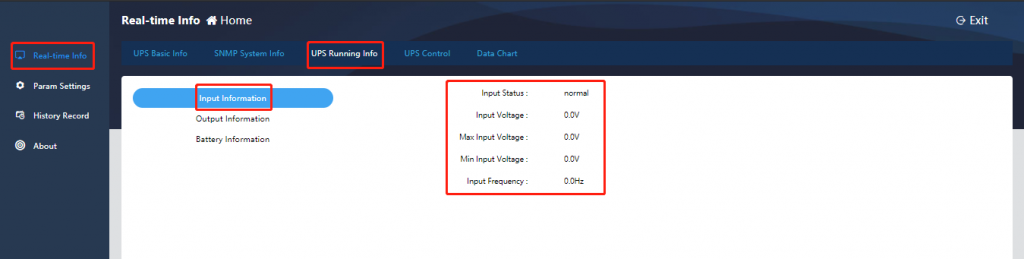
- UPS Operation Information
The content of UPS operation information is different according to the selected communication protocol. Taking MegaTec1:1 protocol as an example, UPS operation information includes input information, output information, and battery information, as shown in the following figure:
Input information:
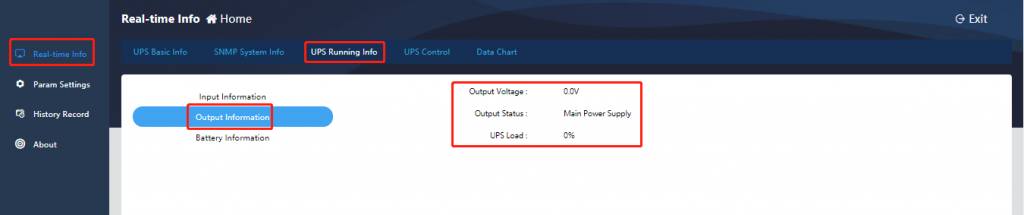
Output information:
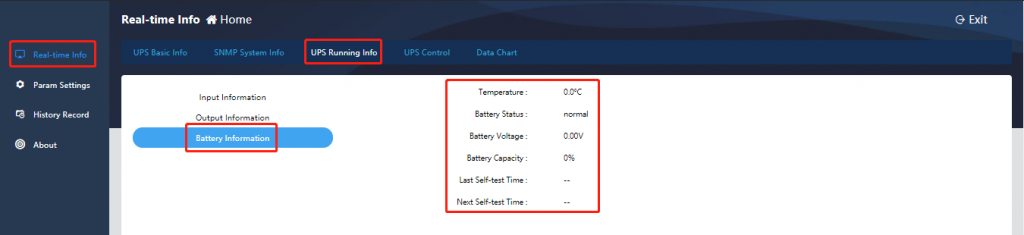
Battery information:
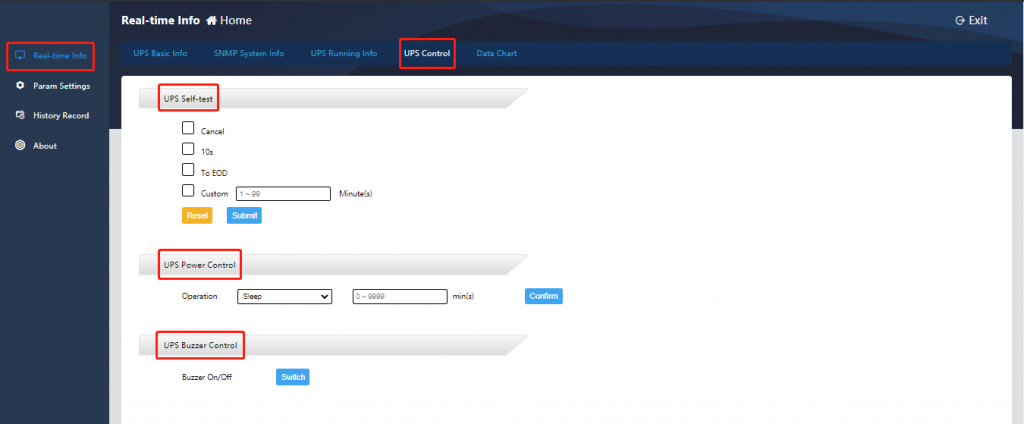
D. UPS Control
The UPS control content is different according to the selected communication protocol. Take the MegaTec1:1 protocol as an example, it includes manual UPS self-check, manual power on/off and buzzer on/off control, as shown in the figure below;
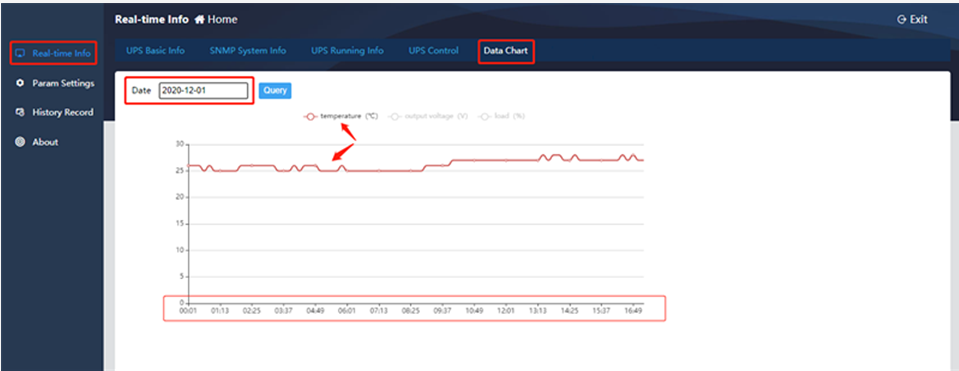
This item can be used to query the single day operating data change curve of the equipment by selecting a specific date. The data types include temperature (°C), output voltage, and load (%). You can select or cancel the type to be displayed by clicking the mouse. The curve recording interval is 90 minutes.
1.2. Parameter Settings
1.2.1. Parameter Settings
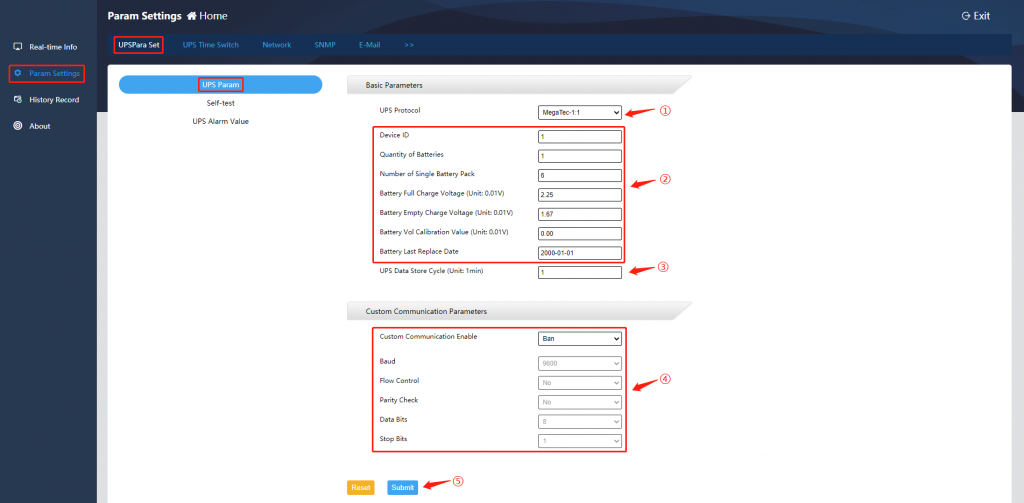
- UPS Parameter Settings
Here you need to ①Select the UPS protocol according to the actual situation on site, ②Fill in the battery information、device ID ③Data store cycle, ④Customize communication parameters (no need to be set by default), after parameter setting, ⑤Click “Submit” and it’s effective, as shown in the figure below:
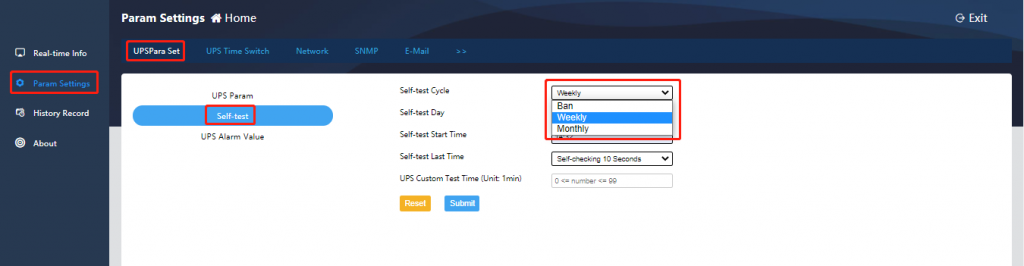
- Self-check Settings
This function depends on whether the UPS host has a self-check function. The UPS self-check cycle can be weekly/monthly, and the self-check time can be customized, 10 seconds or until the battery voltage is low. Click [Submit] after completing the setting, as shown in the figure below:

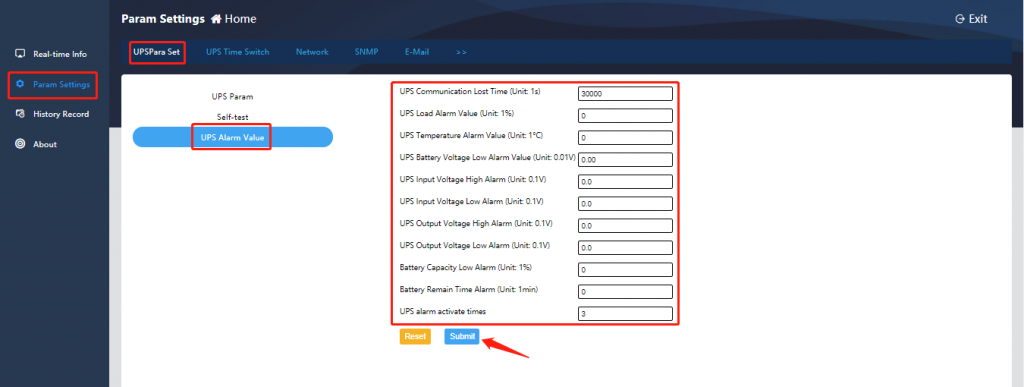
- UPS Alarm Value Setting
This item allows customizing the UPS communication loss time (for example, if 30 seconds is set, the UPS is offline when the communication is lost for 30 seconds), load alarm value, temperature alarm value, battery voltage low alarm value, UPS input/output voltage alarm Value, UPS alarm activation times (for example, if the setting value is 3, it will output alarm information when the program returns 3 consecutive polls); after completing the settings, click [Submit] to confirm.
Note: Except UPS communication loss time and UPS alarm activation times, when other custom alarm values are set to 0, meas this type of alarm is not enabled.
1.2.2. UPS Time Switch
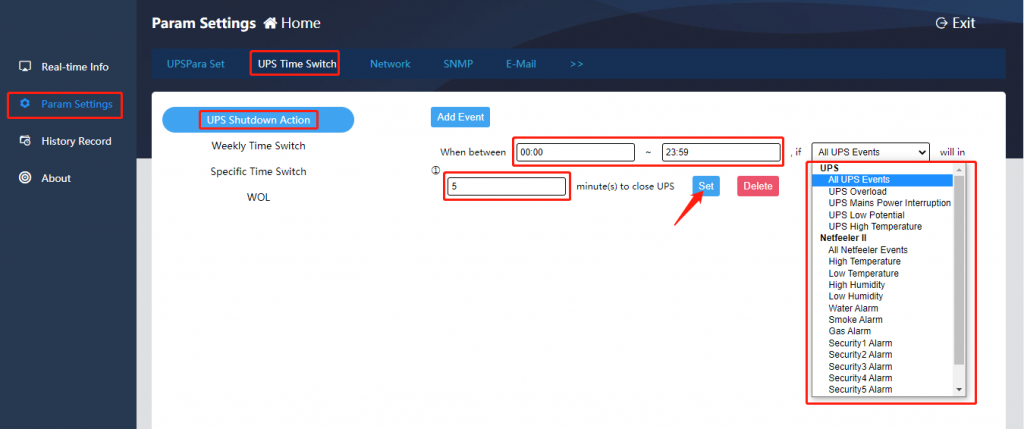
- UPS Shutdown Action
This function allows selecting the time period of shutdown, shutdown conditions, and execution time of shutdown. After setting, click [Set] to confirm:
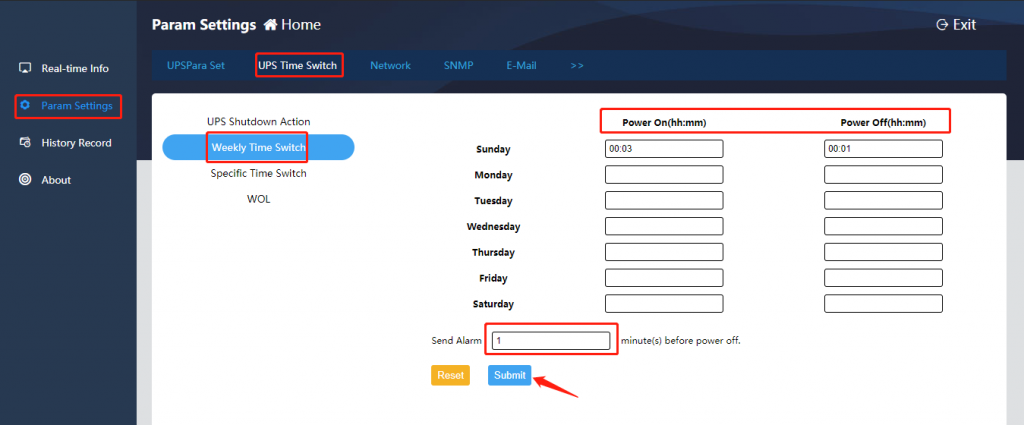
- Weekly Time Switch
This setting takes one week as a cycle. You can set the specific time of one day or several days in the cycle to perform the power on/off action, and you can set the minutes of sending an alarm before shutdown. After completing the setting, click [Submit] to confirm, as shown below:
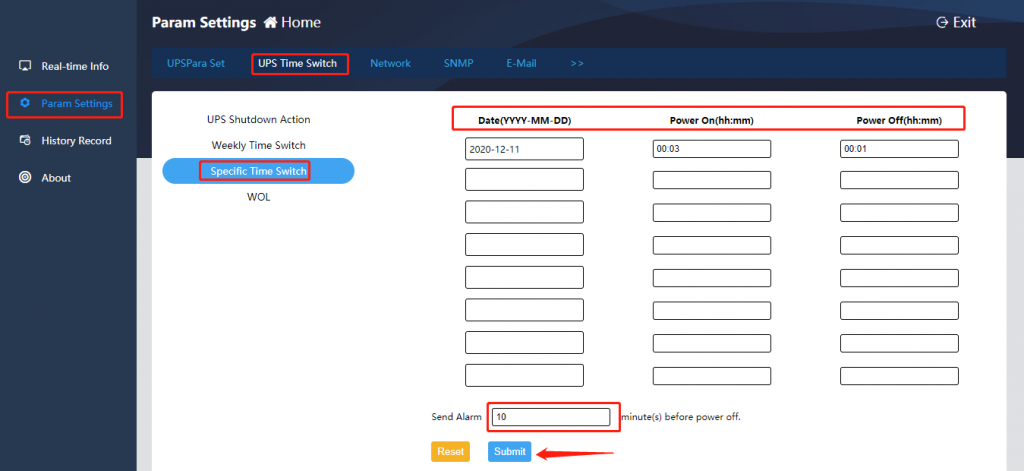
- Specific Time Switch
This item allows setting the specific date and time to perform the power on/off action, and can set the minutes of sending an alarm before shutdown. After completing the setting, click [Submit] to confirm, as shown below:
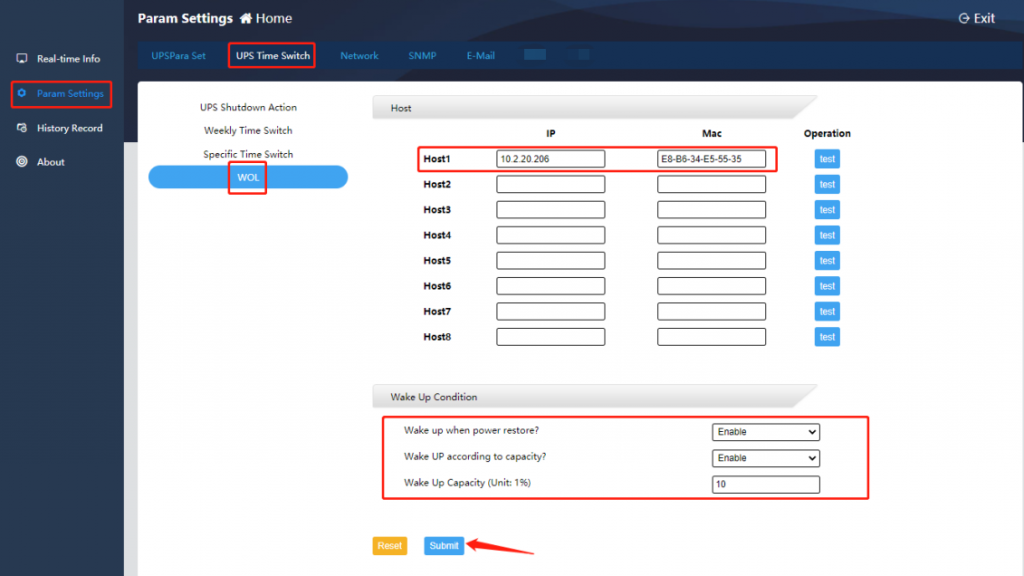
- WOL
This item allows setting wake-up of specific host (the computer mainboard should support wake-up setting function), set to wake up when the power is restored or wake up when the power reaches the set percentage. After completing the settings, click [Submit] to confirm, as shown below:
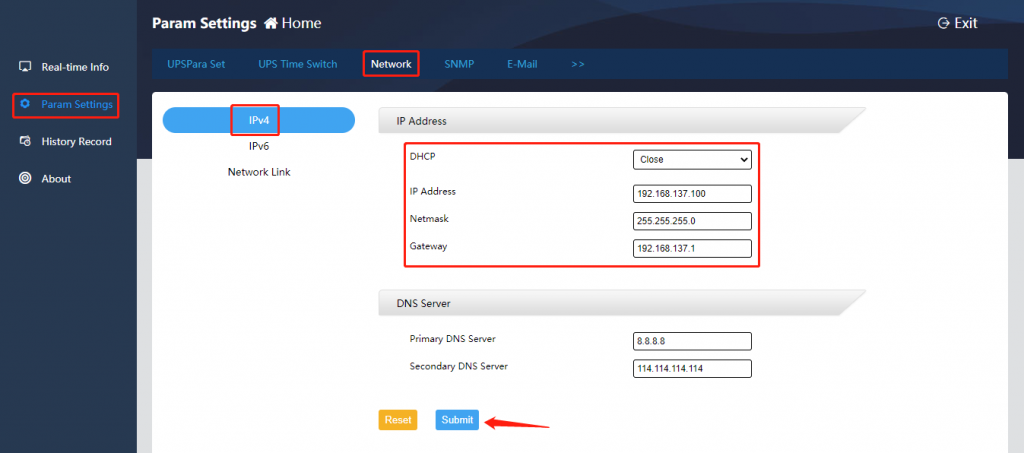
1.2.3. Network Settings
This item allows setting the static IP address of the SNMP card, filling in the corresponding subnet mask and gateway, and setting the DNS server when using the domain name resolution function; click [Submit] to confirm after completing the settings, as shown below:
1.2.4. SNMP Settings
A. System Settings
This item allows changing the system information (system name, system administrator, system location), and setting the SNMP port. The default Agent port is 161 (the data transmission port for uploading real-time data when the platform issues polling instructions), and the Trap port is 162 (data transmission port for real-time upload of alarm information). After completing the settings, click [Submit] to confirm, as shown in the figure below:

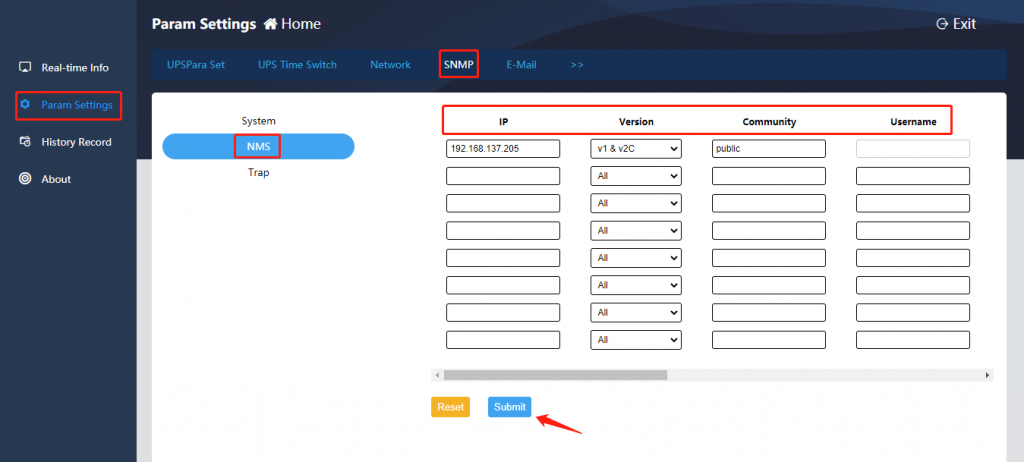
B. NMS Settings
If no IP address is set, the card has no access restrictions. Any IP can obtain the SNMP card operating data by visiting the SNMP card; if the IP, community string and version are set, only the IP added in the settings can visit the device;
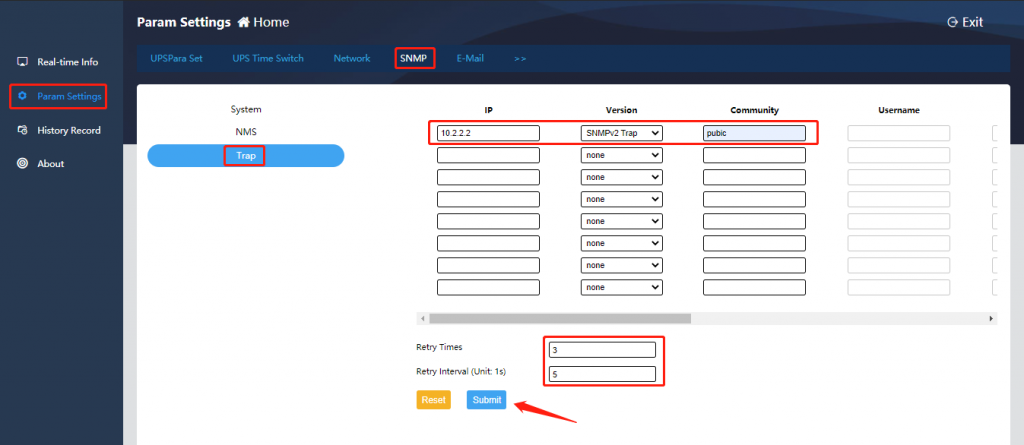
C. Trap Settings
This item allows setting the monitoring server IP and version (SNMPv1 Trap, SNMPv2 Trap, SNMPv2 Inform, SNMPv3 Trap, SNMPv3 Inform), and filling in the community string (can be understood as the transmission password of the SNMP protocol, the SNMP card and the connected monitoring platform should have consistent setting). After the above settings are completed, the alarm information of the SNMP card can be uploaded to the designated monitoring platform in real time, and the number of retries and retry interval can be set. After completing the settings, click [Submit] to confirm, as shown below:
1.2.5. E-Mail Settings
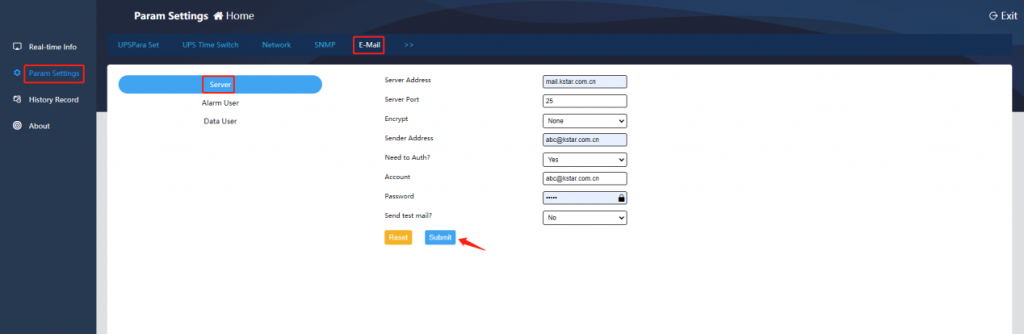
A. Server Settings
This item needs to set the e-mail server address, server port number, sender address (same as the sending e-mail account), sending e-mail account and sending e-mail password. In addition, you can check whether the e-mail is encrypted and whether to send a test email. After completing the settings, click [Submit] to confirm, as shown below:

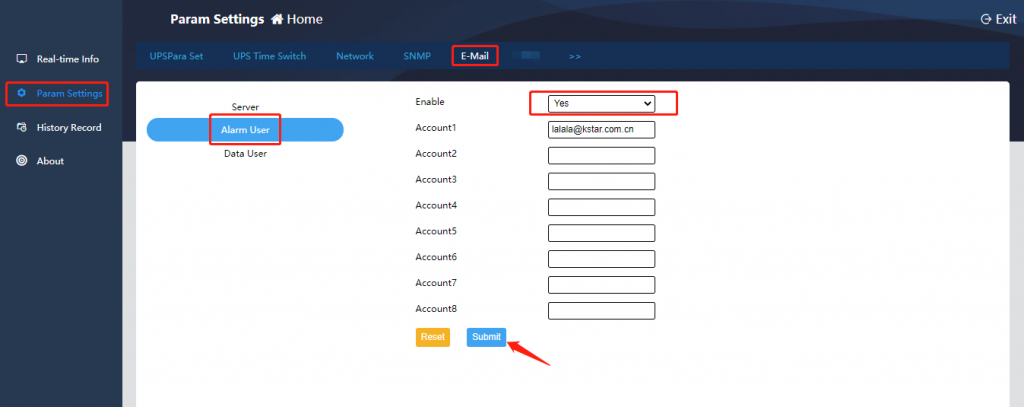
B. Alarm User Settings
This item needs to fill in the e-mail account that will receive the alarm email and select “Yes” for Enable to activate the e-mail alarm function. After completing the settings, click [Submit] to confirm, as shown below:
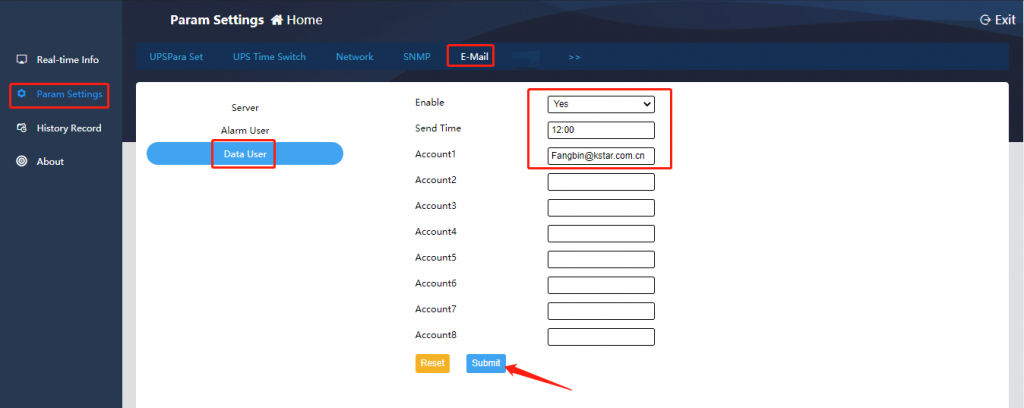
C. Data User Settings
This item is to regularly receive the operating history data of the previous day (00:00 to 23:59) of the device. Enable this function by selecting “Yes”, selecting the sending time, and filling in the e-mail account that receives the data. After completing the settings, click [Submit] to confirm, as shown below:
1.2.6. System Users
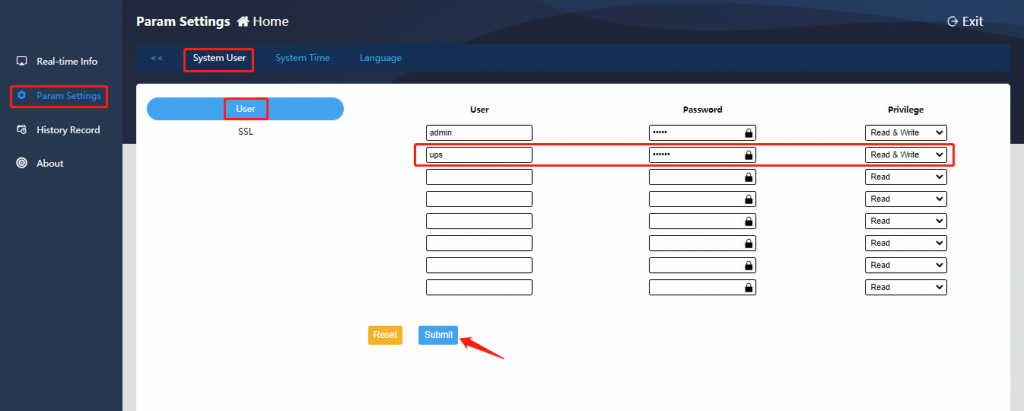
A. User Settings
This item allows adding users, filling in user name and password, and setting user permissions (read & write). After completing the settings, click [Submit] to confirm, as shown below:
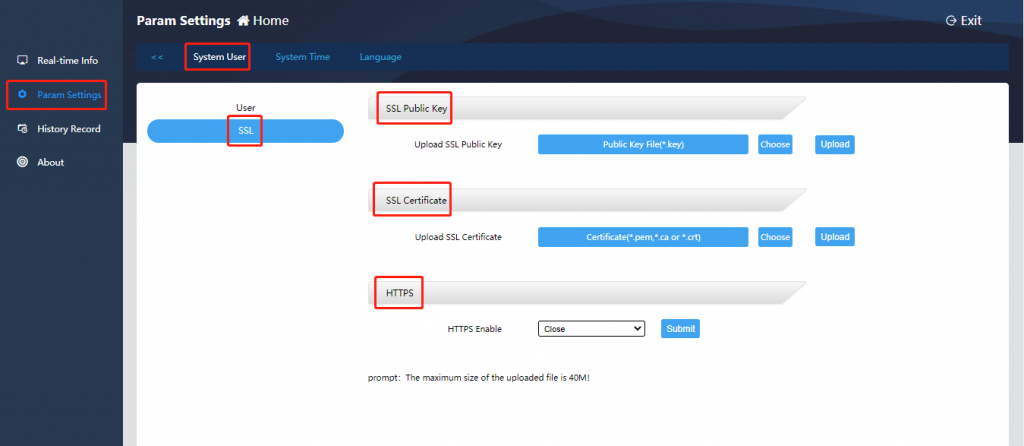
B. SSL Settings
This setting enables HTTPS access mode, and SSL public key and SSL certificate need to be uploaded.
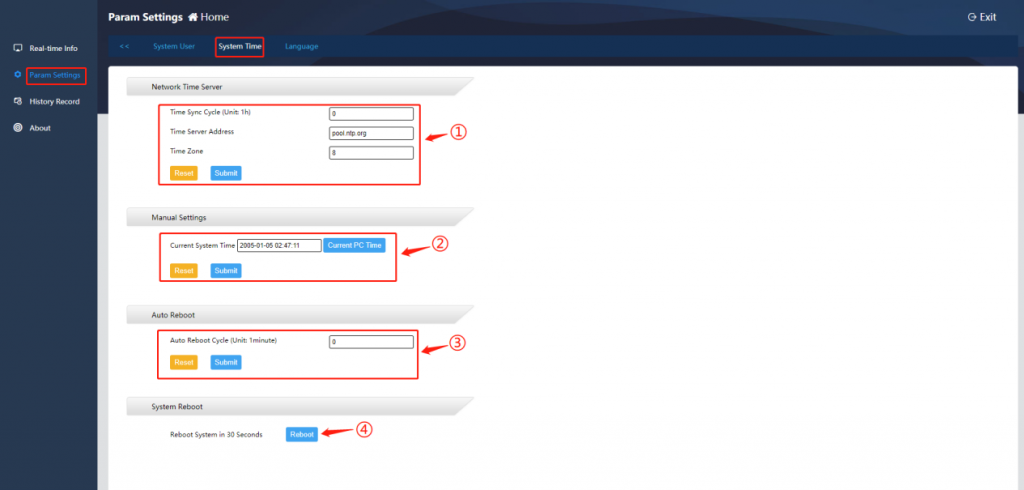
1.2.7. System Time
This item allows setting the system time and selecting the system restart method:
(1) Network time server settings: Fill in the time synchronization period, time server address, time zone, and click [Submit] to confirm;
(2) Manual setting: Click [Current PC Time], and then click [Submit] to manually synchronize the current computer time;
(3) Automatic restart: Fill in the automatic restart period in minutes;
(4) System restart: Click [Reboot] for 30 seconds to restart the device.
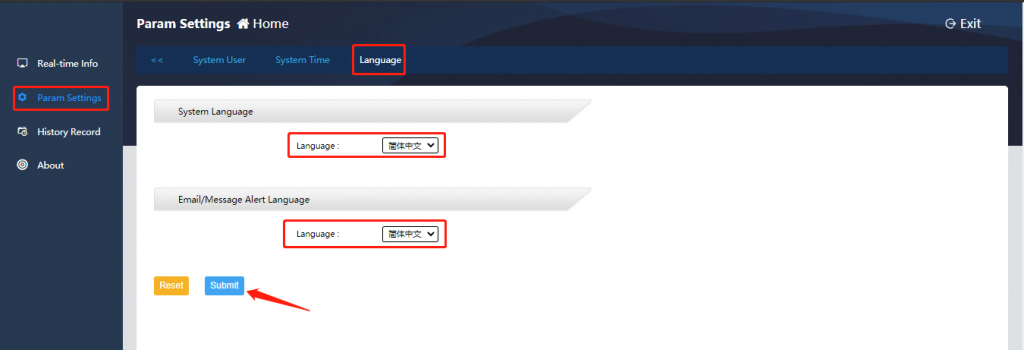
1.2.8. Language
This item allows setting the system language (Simplified Chinese/English) and the message language (Simplified Chinese/English). After completing the settings, click [Submit] to confirm, as shown below:
1.3. History
Historical record capacity: 60, 000 data logs (if the historical data recording interval is 1 minute, the historical data can be saved for 40 days), 5, 000 event logs and setting logs, and 10, 000 environmental logs.
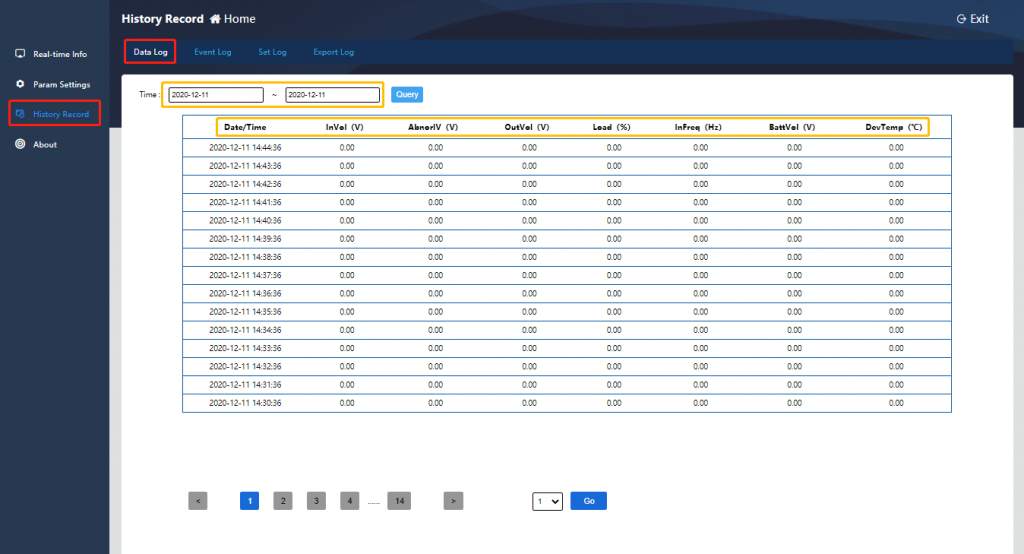
1.3.1. Data Log
By filtering the time period, you can query the equipment running data log.
1.3.2. Event Log
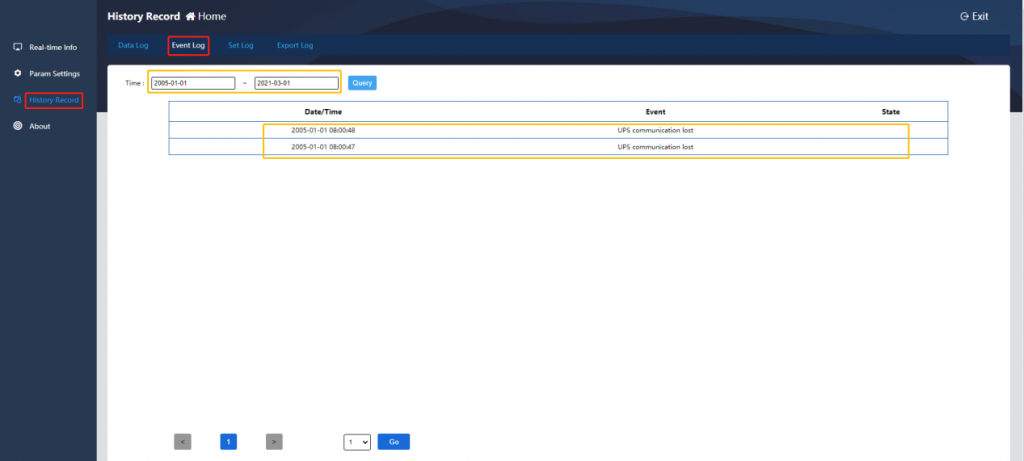
By filtering the time period, you can query the equipment event log.
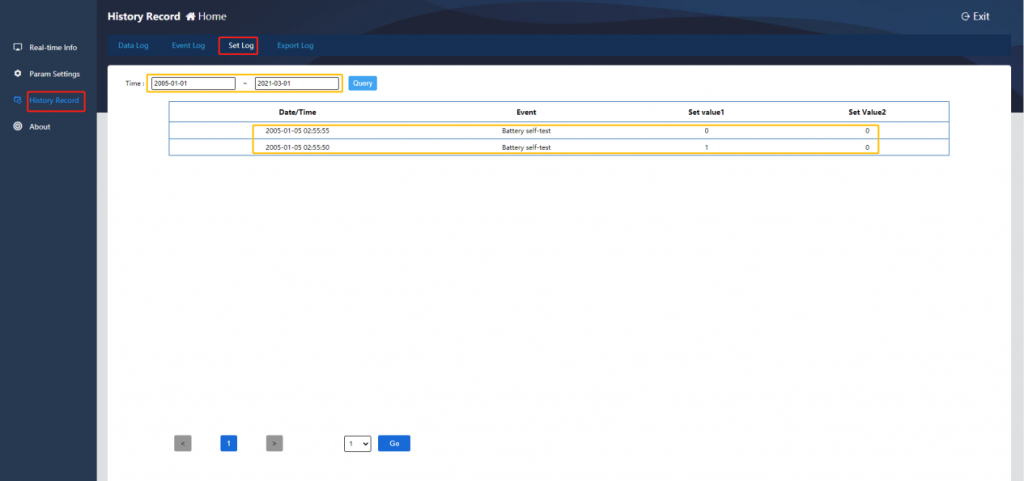
1.3.3. Set Log
By filtering the time period, you can query the equipment setting log.
1.3.4. Export Log
By filtering the time period, select the log type to be exported, and click [Export] to download the log file in Excel format. After the download is successful, click [Close] to complete the log export.